Tạo project static lib
1. Chọn File, New, Project
2. Chọn Win32 Project

3. Chọn Static library và bỏ chọn Precomplied header

4. Tạo file LibTest.cpp và LibTest.h
LibTest.cpp
#include "LibTest.h"

float sum(float a, float b)
{
    return (a + b);
}

float sub(float a, float b)
{
    return (a - b);
}
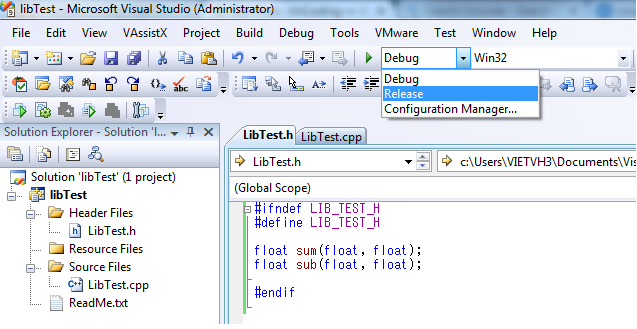
LibTest.h
#ifndef LIB_TEST_H
#define LIB_TEST_H

float sum(float, float);
float sub(float, float);

#endif
5. Build lib project với mode Debug hoặc Release. Output là LibTest.lib file.
Sử dụng static lib vào project khác
1. Tạo console project “consol_app” trên Visual C++
#include "LibTest.h"
#include "stdio.h"
#include "conio.h"

void main()
{
    float a = 10.9, b = 20.7;
    float res;
    res = sum(a, b);
    printf("%f + %f = %f\n", a, b, res);
    res = sub(a, b);
    printf("%f - %f = %f\n", a, b, res);
    getch();
}
2. Add LibTest.lib vào project
Khi add thêm 1 lib static vào project, chúng ta cần file .lib và file header khai báo các hàm trong lib.
2.1 Copy file LibTest.h và LibTest.lib vào thư mục project “consol_app“.

2.2 Khai báo lệnh #include “LibTest.h”

2.3 Add đường dẫn của file LibTest.lib vào mục Additional Dependencies
(nếu LibTest.lib và LibTest.h đặt ở thư mục khác thư mục project “consol_app” thì chúng ta phải khai báo đường dẫn đầy đủ”

3. Build and run “consol_app”

Chú ý:
“LibTest.lib” và “consol_app” phải được setting giống nhau:
– Mode build (Debug hoặc Release)
– Character Set (Use Unicode Character Set hoặc Use Multi-Byte Character Set)
Leave a Reply
You must be logged in to post a comment.